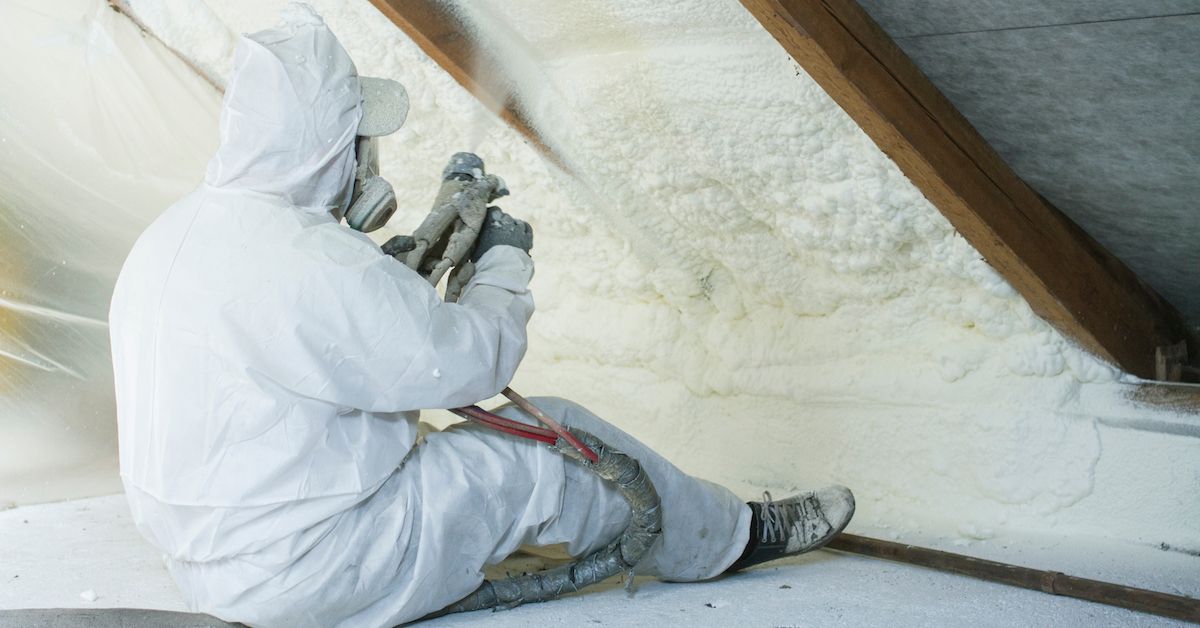
Can You Add Spray Foam Insulation Yourself?
Making your home more energy-efficient is a great way to save money, as well as reduce the environmental impact of heating and powering your home. Home insulation comes in a variety of effective options for reducing the loss of heat. Of these, spray foam insulation has a number of benefits that might make it the premier solution for your home.
In today’s culture of DIY home improvement, many people wonder if they can install spray foam insulation themselves instead of hiring a professional. Although you can DIY spray foam insulation yourself, the real question is if you should do it yourself?
Understanding Spray Foam Insulation
When exploring DIY spray foam insulation options, you’ll encounter two primary types that serve different purposes in your home. According to the Department of Energy, proper insulation can reduce your heating and cooling costs by up to 15% and even more if we have a colder Colorado winter.
Understanding the differences between open-cell and closed-cell foam will help you make an informed decision for your specific needs:
- Open-cell spray foam, with its lighter density and flexible structure, proves ideal for interior applications and sound reduction.
- Closed-cell spray foam, while more expensive, offers superior insulating properties and creates an effective moisture barrier, making it perfect for exterior walls, attics, and cathedral ceilings. The density of closed-cell foam also adds structural integrity to your walls, providing an additional benefit beyond insulation.
Key Considerations of DIY vs. Professional Installation
A spray foam insulation kit can be a valuable tool for DIY enthusiasts, offering a convenient and effective way to insulate your home. These kits often come with specific features such as fire ratings and foam rise characteristics, making them suitable for various insulation projects.
Modern DIY spray foam kits come equipped with everything you need for successful application, including detailed instructions and safety equipment. These kits typically range from small projects covering 200 board feet to larger applications of up to 600 board feet, allowing you to choose the right size for your specific project.
Proper application technique significantly impacts the effectiveness of your insulation project. You’ll need to maintain a consistent spray pattern and appropriate distance from the surface to achieve optimal coverage. The foam expands rapidly after application, reaching its full size within minutes, so proper timing and technique are crucial for successful installation.
Breaking Down Spray Foam Installation Costs
The initial cost difference between DIY spray foam insulation and professional installation can seem substantial. The upfront investment for DIY spray foam typically ranges from $500 to $1,500 for a 200-600 square foot area, while professional installation costs between $5.00 and $7.50 per square foot.
The basic DIY kit includes the foam components, application nozzles, and basic installation instructions. However, you’ll need to factor in additional safety equipment, such as a full-body suit, respiratory protection, and eye protection, which can add $100-200 to your total investment. Application tools and cleanup materials further increase the initial expense by $75-225.
Hidden Costs of DIY Installation
While the DIY approach might seem more economical at first glance, several hidden costs can significantly impact your total investment. Research from HomeAdvisor suggests that DIY installations often require 20-30% more material due to application errors and waste. The learning curve associated with proper application techniques can lead to multiple attempts and additional material purchases.
Time investment represents another significant hidden cost in DIY installation. You’ll need to spend hours researching proper techniques, preparing the space, and carefully applying the foam. Additionally, if mistakes occur, you might face costly repairs to fix damaged drywall, electrical components, or other building materials affected by improper application.
Professional Installation Value Benefits
Professional installation offers several long-term advantages that offset the higher initial cost. According to the Spray Polyurethane Foam Alliance, professionally installed foam insulation typically lasts over 20 years and maintains its R-value throughout its lifetime. Professional installers use higher-grade materials and specialized equipment that ensures consistent coverage and optimal thermal performance.
The warranty protection included with professional installation provides significant value and peace of mind. Most certified installers offer comprehensive warranties covering both materials and workmanship for periods ranging from 10 to 25 years. Professional installation also typically meets insurance requirements and building codes, preventing potential issues with future home sales or claims.
Essential Safety and Preparation for DIY Installation
Before starting your spray foam installation project, gather all necessary safety equipment and verify each item’s condition. Here are the critical pieces of safety gear you’ll need:
- Respiratory Protection: A NIOSH-approved full-face respirator with organic vapor cartridges rated for isocyanates
- Body Coverage: Disposable coveralls with hood and boot covers to prevent skin exposure
- Hand Protection: Chemical-resistant nitrile gloves rated for isocyanate exposure
- Eye Protection: Safety goggles that seal completely around the eyes if not using a full-face respirator
- Foot Protection: Steel-toed boots to protect against falling equipment and provide stability
The initial investment in proper preparation and equipment will pay dividends through improved energy efficiency and comfort in your home.
Workspace Setup and Ventilation
Proper ventilation is crucial when working with spray foam insulation. Adequate air exchange helps minimize exposure to chemicals, and it can reduce airborne chemical concentrations by up to 90%. You should set up multiple fans to create cross-ventilation and ensure fresh air circulation throughout the work area.
Temperature and humidity control are also vital to the successful application of spray foam. For optimal foam curing, the workspace should maintain a temperature between 65-85°F and relative humidity below 80%. You must also protect all surfaces with plastic sheeting and painter’s tape, creating proper containment zones to prevent overspray damage.
Essential Project Considerations
Before starting your DIY spray foam project, several critical factors require careful consideration. Here are the key elements that will determine your project’s success:
- Temperature Requirements: Most spray foam products require ambient temperatures between 60-80°F for optimal application.
- Surface Preparation: All surfaces must be clean, dry, and free from dust or debris before application.
- Safety Equipment: Proper protective gear including respirators, coveralls, and eye protection is essential.
- Ventilation Setup: Adequate ventilation systems must be in place during and after application.
- Curing Time: Allow 24-72 hours for complete curing before closing up walls or continuing construction.
Mastering DIY Spray Foam Application Areas
Research from the Spray Polyurethane Foam Alliance shows that proper installation techniques directly correlate with the long-term performance of spray foam insulation. Understanding and implementing these considerations will ensure your DIY project achieves professional-quality results.
Here’s how to tackle different spaces effectively:
- Attic Insulation Success: Your attic presents unique challenges when applying spray foam insulation, requiring careful techniques due to confined space and varying temperatures to achieve optimal coverage and thermal resistance. Begin by thoroughly cleaning the attic space and ensuring adequate ventilation through soffit and ridge vents. Work methodically between joists from the furthest point toward the access, maintaining consistent thickness.
- Wall Cavity Application Methods: Insulating wall cavities requires strategic planning and careful application to achieve maximum effectiveness. Remove outlet covers and ensure you can reach all cavity spaces effectively. Use a systematic approach, working from bottom to top in slow, controlled movements to prevent gaps and ensure even coverage. Allow each section to cure completely before moving to adjacent areas to prevent displacement and ensure proper adhesion.
- Basement and Rim Joist Tactics: Focus particular attention on rim joists, where significant heat loss often occurs. Apply the foam in continuous beads, ensuring complete coverage of all gaps and seams. Multiple thin layers often provide better results than a single thick application, allowing proper curing and preventing trapped air pockets that could compromise insulation effectiveness.
- Window and Door Frame Protection: Proper insulation around windows and doors significantly impacts your home’s overall energy efficiency. Start with thorough cleaning of all frame surfaces and ensure the area is completely dry before application. Apply foam in thin layers to prevent excessive expansion that could potentially warp frames or affect door and window operation. Monitor the expansion rate carefully and maintain a consistent application speed to achieve uniform coverage.
Making The Final Decision: DIY or Professional
Your decision between DIY and professional installation should consider both immediate and long-term financial impacts. Professional installation typically delivers superior energy savings, with studies from Department of Energy showing up to 50% better performance compared to DIY applications. The professional option also provides better coverage consistency and fewer potential problems down the line.
When calculating your return on investment, consider that professional installation often pays for itself through energy savings within 3-5 years. The higher quality materials and expert application techniques result in better air sealing and insulation performance. Additionally, professional installation typically includes pre-installation assessment and post-installation quality checks, ensuring optimal results for your specific situation.
Beyond the technical considerations, spray foam insulation embodies a broader narrative of home innovation and personal empowerment. Each carefully applied layer represents a commitment to reducing energy consumption, minimizing environmental impact, and creating more resilient living spaces.
FAQs: DIY Spray Foam Insulation
Can I Spray Foam Without Removing Drywall?
One of the questions we often get about spray foam is if it can be added to existing walls. The answer is yes, but drywall needs to be removed before you can install the foam.
Spray foam expands rapidly when it is applied to the inside of walls. If you try to add the insulation without removing drywall, the expanding foam may overfill the panel and exert pressure against the inside of the plasterboard. This can crack or break the drywall.
As you can see, it is crucial to remove drywall before installing spray foam insulation. You can remove drywall yourself, of course, but this is a messy and time-consuming job. Hiring a professional insulation company may cost more for the initial removal and installation, but experienced technicians will be able to determine how much drywall needs to be removed and where so you can enjoy the full benefits of the insulation without excess time, inconvenience, or cost.
An alternative to spray foam that involves minimal removal of drywall is fiberglass insulation. This requires minimal drywall removal, and we can dense pack the fiberglass into the wall. In our experience, this is the only viable technique for installing insulation in existing walls without first removing the drywall.
Can You Spray Foam Over Your Current Insulation?
More often than not, homeowners are looking to replace or augment existing fiberglass or another kind of insulation. Although spray foam is very sticky, it does not adhere well to fiberglass insulation. Combining the two kinds of insulation actually reduces the effectiveness of both: gaps in the old fiberglass insulation aren’t solved by introducing spray foam, and the continuous barrier that the foam is designed to create does not form properly around the fiberglass.
As a result, the major advantages of spray foam insulation also suffer. Gaps in the foam negatively affect the material’s resistance to heat transfer, and they can also weaken the foam’s ability to resist moisture. Vapor can build up in the walls without proper insulation, even in a dry climate like we have in Colorado, which can cause mold to form.
What happens if I mix the chemicals wrong?
Achieving the perfect chemical balance in spray foam insulation requires precise measurements and proper mixing techniques. Even small variations in the mixing ratio can significantly impact the foam’s performance. Your insulation’s effectiveness can be reduced by up to 50% when chemical ratios are incorrect, leading to incomplete curing.
Temperature fluctuations and improper storage can also affect the chemical composition of your spray foam components. You must carefully monitor both the ambient temperature and the temperature of the chemicals themselves during mixing. The ideal mixing temperature typically ranges between 70-85°F, and maintaining this consistency throughout the application process is crucial for optimal results.
The thickness of your spray foam application directly impacts its insulating properties and safety features. The maximum recommended thickness per pass is typically 2 inches for closed-cell foam and 3 inches for open-cell foam.
Should I Invest in Professional Spray Foam Insulation?
DIY projects may lead to short-term savings. However, potential damage can be extensive if something goes wrong. From damage to drywall to creating conditions for mold to grow, the project can be costly if not done correctly.
Spray Foam Price for REenergizeCO
Spray foam is the best insulation available on the market. It gives you the highest R-Value, R6/inch. R-value is resistant to heat flow (the higher the R-value the better). We use a low-pressure system, which is much safer to use in residential retrofits. Our closed cell foam is fully cured within 1 hour, as opposed to high-pressure spray foam that can take 24+ hours to cure. In most cases, we apply 3″³ or R18 of closed cell Polyurethane spray foam. This cost range is approximately $10 sq/ft.
Xcel Rebates for Colorado Customers
Rebate Tiers: Standalone vs. Whole Home Efficiency (WHE)
There are two rebate structures available:
- Standalone Rebates – Customers receive a set rebate amount for insulation and air sealing.
- Whole Home Efficiency (WHE) Rebates – Requires a home energy audit but offers higher rebate potential. This program is free to enroll in after an audit, and customers have two years from the audit date to complete qualifying upgrades.
Air Sealing Rebates (2025)
Standalone Rebate:
- Standard: 30% of project cost, up to $400
- With Xcel Gas Multiplier: Up to $600
Whole Home Efficiency Rebate:
- Up to $1,000 (requires energy audit and program enrollment)
Requirements:
- Must conduct a blower door test before and after the project
- Must show at least 20% air leakage reduction
Attic Insulation Rebates (2025)
Standalone Rebate:
- Standard: 30% of project cost, up to $500
- With Xcel Gas Multiplier: Up to $750
- New eligibility requirement: Existing attic insulation must be R-24 or lower (previously R-15)
Whole Home Efficiency Rebate:
- More complex calculation based on:
- Rebate tier x Change in R-Value x Attic area
Minimum completed attic insulation level: R-60
Wall Insulation Rebates (2025)
Standalone Rebate:
- Standard: 30% of project cost, up to $525
- With Xcel Gas Multiplier: Up to $525
Whole Home Efficiency Rebate:
- Up to $875 (requires energy audit and program enrollment)
Requirements:
- Must install R-13 or greater in empty wall cavities (knee walls do not qualify)
When you work with REenergizeCO, you get the combined benefits of premium spray foam insulation and a company with the knowledge and experience to help you make the best decisions for your home.
Our hardworking group of energy efficiency experts can help you reduce your energy costs and make your Denver home more comfortable. Hiring us is easier on you, and you can rest assured that our local Colorado team will properly install the spray foam insulation.
If you are considering ways to improve your home’s energy usage, don’t hesitate to contact us with your questions. We will review your needs and goals and recommend solutions. Should you decide to hire a professional insulation company, REenergizeCO serves homes in Denver, Fort Collins, Colorado Springs, Arvada, and throughout the Front Range.
Share on:
Get In Touch
By submitting this form, you consent to receive emails from REenergizeCO. You can unsubscribe at any time by clicking the link in the footer of our emails. Emails are serviced by Constant Contact.
Related Posts

Does Insulation Keep Heat Out During a Colorado Summer?
Articles on Energy SavingWith the growth and innovation happening in the insulation realm, we're confident that we can insulate you…
Read More »
How Much Insulation Do I Need in Colorado?
Home Insulation ArticlesYour heating bill just arrived, and the number is shocking. You're wondering whether better insulation cou…
Read More »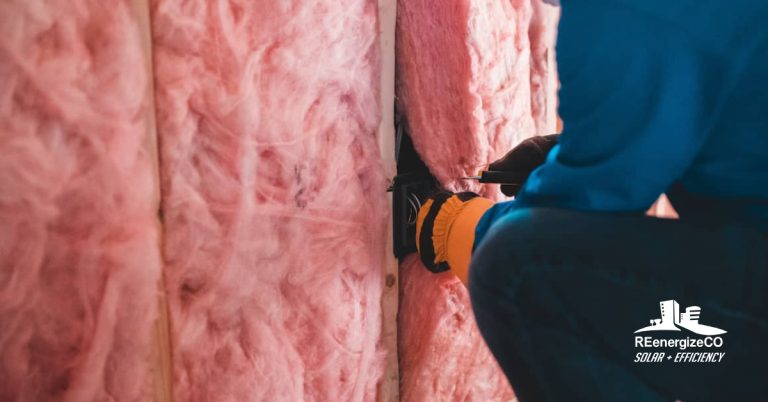
Is An Attic Insulation Upgrade Worth It?
Home Insulation ArticlesThat $300 heating bill last January? Up to $100 of it likely escaped straight through your attic. Colorad…
Read More »